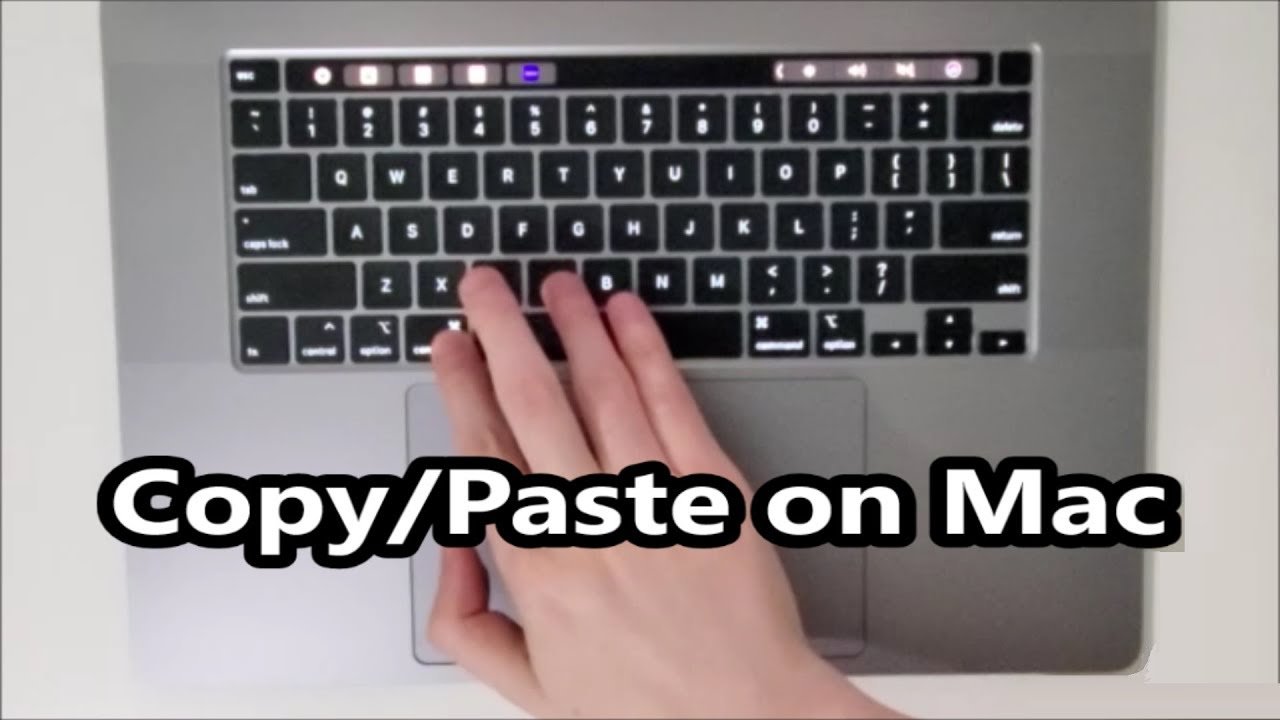
Making the switch from a Windows PC to a MacBook is an exciting experience, characterized by sleek hardware and a fluid operating system. However, it often comes with a moment of mild panic when you try to perform the most basic task in computing: copying and pasting. Your muscle memory reaches for the Ctrl key, and suddenly, nothing happens.
You are not alone. This is the single most common hurdle for new Mac users. The core functionality is identical, but the keyboard modifier key has changed. Mastering how to copy and paste on a MacBook is not just about memorizing new keys; it’s about unlocking a foundational layer of efficiency that will define your entire experience with macOS. Once these shortcuts become second nature, you stop thinking about the process and start focusing purely on your work.
This guide goes beyond simply telling you which keys to press. We will break down the essential shortcuts, explore the hidden power of the Mac clipboard, and provide actionable tips to help you work smarter and faster.

Table of Contents
ToggleUnderstanding the Mac Modifier Keys
Before diving into the shortcuts, it’s crucial to understand the physical layout that makes them work. If you are coming from Windows, your left pinky has a deeply ingrained habit of seeking out the Control (Ctrl) key in the bottom-left corner of the keyboard.
On a MacBook, that key is still there, but its function has been relegated to secondary tasks. The primary driver of system-wide shortcuts is the Command (⌘) key, located directly next to the space bar.
-
Command (⌘): The primary modifier key on macOS. It executes standard shortcuts like Copy, Paste, Select All, and Undo.
-
Option (⌥): Often used for alternative actions, typing special characters, and moving the cursor more precisely. In the context of copying and pasting, it enables the “Move” function.
-
Control (⌃): Rarely used for copy/paste in modern Mac software, though it has specialized uses in terminal commands.
-
Shift (⇧): Used for text selection and, in combination with the Option key, for pasting text that matches the destination style.
The golden rule for switching from Windows to Mac is simple: mentally replace Ctrl with Command. Train your thumb to reach for the Command key instead of curling your pinky for Control. This single adjustment is the key to unlocking fluid text manipulation.
How to Copy and Paste on a MacBook: 7 Essential Shortcuts
Here are the seven fundamental shortcuts that will instantly transform you from a Mac novice into an efficient user. These are the core commands for learning how to copy and paste on a MacBook, covering everything from basic copying to advanced style matching.
1. The Standard Copy Command (⌘ + C)
This is the foundational shortcut. Start by selecting the text, file, image, or folder you want to duplicate. To select text, click and drag your cursor over it. To select a file in the Finder, simply click on it once. Once the item is highlighted, press and hold the Command (⌘) key, tap the C key, and release both.
This action places a perfect duplicate of the selected item onto the Mac’s invisible storage area called the “Clipboard.” Visually, nothing on your screen will change, giving you no confirmation that the action worked. This often leads beginners to copy the same thing multiple times out of uncertainty. Trust the process; the data is securely held in the background.
2. The Standard Paste Command (⌘ + V)
Once data is on the Clipboard, you need to retrieve it. Navigate to your destination—a text document, a folder window, an email body, or an image editor. Click on the exact location where you want the data to appear to ensure your insertion point is active. Then, press and hold the Command (⌘) key and tap the V key.
The contents of the Clipboard will instantly appear in the new location. Unlike copying, pasting provides immediate visual feedback. The key advantage is that the data remains on the Clipboard, allowing you to paste the same item repeatedly until you overwrite it with a new Copy or Cut command.
3. The Cut Command (⌘ + X)
Many new users mistakenly look for a “Cut” option in the Finder when managing files, but this works differently on a Mac. For text editing, the Cut command is straightforward. Select the text you want to remove from its original location and move to a new one. Press Command (⌘) + X.
The selected text will vanish from the screen, but it is now stored on the Clipboard. You can then use Command (⌘) + V to paste it elsewhere. This is a “move” operation, in contrast to Copy, which creates a duplicate.
Critical Distinction for Files: For documents, images, and folders in the Finder, ⌘ + X is not visually effective. It doesn’t ghost the file like in Windows. Instead, you must use ⌘ + C to copy the file, and then use a special Paste command to move it, which we cover next.
4. The Move Shortcut for Files (⌘ + Option + V)
This is perhaps the most revolutionary shortcut for people learning how to copy and paste on a MacBook because it has no direct equivalent in Windows. To physically move a file from one folder to another—rather than creating a duplicate—you use a two-step process with a special paste command.
First, select the file and press ⌘ + C to copy it. Navigate to the destination folder. Now, instead of using the standard paste, press ⌘ + Option + V.
The file will instantly disappear from its original location and appear in the new folder. This performs a “Move” operation. It prevents you from accidentally leaving behind a cluttered trail of duplicate files and is a significantly cleaner way to organize your Mac’s file system.
5. Paste and Match Style (⌘ + Shift + Option + V)
In a perfect world, copying text from one source and pasting it into another would always look seamless. In reality, you often copy a paragraph from a website with a blue, bold, 18-point font and paste it into a professional report that uses a black, 12-point font. The result is a formatting disaster.
The solution is “Paste and Match Style.” Rather than bringing the original formatting along with the text, this command strips out the source styling and adapts the pasted text to match the destination document’s formatting instantly.
The exact shortcut can vary slightly between applications, but the most reliable one in apps like Apple Pages or Safari is ⌘ + Shift + Option + V. Many third-party apps like Google Docs and Microsoft Word default to ⌘ + Shift + V for this function. Test both, and you’ll find one that saves you from endless manual reformatting.
6. Select All (⌘ + A)
Before you can copy or cut, you need to select. When you need to grab everything—the entire body of an email, all the code in a script, or every file inside a folder—the Select All command is indispensable. Press ⌘ + A.
Instantly, every item in the active window or every character in the active text field is highlighted. From there, you can smoothly chain the command with ⌘ + C to copy everything to the clipboard. It’s a universal command that works in Finder, text editors, web browsers, and virtually every other application.
7. Undo (⌘ + Z)
While technically not a copy or paste command, Undo is the essential safety net that works hand-in-hand with these editing tasks. We all make mistakes. You might accidentally paste a block of text into the wrong paragraph, or you might move a file to the wrong folder using ⌘ + Option + V.
In these moments, your immediate reaction should be ⌘ + Z. This command will reverse your last action, whether it was a paste, a cut, a delete, or a file move. It’s the most reassuring shortcut on any MacBook, giving you the freedom to experiment and work quickly without fear of permanently destroying your work.
Summary Table of Essential Shortcuts
| Action | Windows Shortcut | MacBook Shortcut | Context of Use |
|---|---|---|---|
| Copy | Ctrl + C | ⌘ + C | Text, files, images |
| Paste | Ctrl + V | ⌘ + V | Standard insertion of copied/cut data |
| Cut | Ctrl + X | ⌘ + X | Moving text, not files |
| Move File | Ctrl + X, then Ctrl + V | ⌘ + C, then ⌘ + Option + V | Moving files in Finder |
| Select All | Ctrl + A | ⌘ + A | Highlighting all contents |
| Paste & Match Style | Ctrl + Shift + V | ⌘ + Shift + Option + V | Pasting text without source formatting |
| Undo | Ctrl + Z | ⌘ + Z | Reversing the last action |
Copy and Paste via the Menu Bar and Right-Click
While keyboard shortcuts are the fastest method, macOS also offers visual controls that are invaluable for beginners who are still building their muscle memory. Every Mac application has a Menu Bar at the very top of the screen. This is a dynamic text-based control panel that changes depending on which application is currently active.
When you are in Safari, Pages, or even the Finder, look at the top-left of your screen next to the Apple logo. You will see an Edit menu. Click on it, and you’ll find a dropdown list including Undo, Cut, Copy, Paste, and Paste and Match Style. What makes this incredibly useful for learning how to copy and paste on a MacBook is that the menu displays the corresponding keyboard shortcut next to the action in grayed-out text. Refer to it as a quick cheat sheet until the shortcuts become instinctive.
The second visual method is the contextual right-click menu. This is the same functionality found in Windows.
-
For Text: Simply highlight the text and right-click on it using a two-finger click on the trackpad (if enabled in System Settings), or hold the Control key and click.
-
For Files: Right-click on a file icon.
A menu will instantly appear, presenting Copy, Paste, and other options relevant to what you’ve selected. This method is particularly useful when your hands are already on the trackpad and you’re browsing leisurely, though it is less efficient for high-speed workflow compared to keyboard commands.
🌐 More in Tech Review

The Universal Clipboard: Seamless Cross-Device Integration
One of the most powerful features that elevates how to copy and paste on a MacBook beyond a simple local action is Apple’s Universal Clipboard. This feature is part of the Continuity suite, which seamlessly integrates your Apple devices. It allows you to copy content on one device and paste it instantly on another, wirelessly and automatically, with no cloud syncing interface required.
Imagine finding a recipe on your iPhone while browsing the web in your kitchen. You copy the ingredient list on the phone. You then walk over to your MacBook at your desk, open your Notes app, and press ⌘ + V. The text from your iPhone appears instantly. You can also work in reverse, copying a diagram from a document on your Mac and pasting it into a sketch note on your iPad.
System Requirements for Universal Clipboard:
-
All devices must be signed into the same Apple ID.
-
Bluetooth and Wi-Fi must be enabled on all devices; they do not need to be on the same Wi-Fi network but must be on and active.
-
Handoff must be enabled. On a Mac, this is found in System Settings > General > AirDrop & Handoff.
-
Devices must be reasonably close to one another.
The clipboard data is transferred securely via Bluetooth Low Energy and Wi-Fi, and there is a short time limit—typically around two minutes—before the shared clipboard expires. This feature fundamentally redefines the clipboard from a local, temporary slot into a personal, continuous data stream flowing around your digital workspace. For more in-depth information on setting up your devices, you can explore resources about creating a seamless digital ecosystem, similar to how a gamer might configure a mobile triple screen setup simracing to achieve a unified, immersive experience across multiple screens.
Advantages and Drawbacks of Keyboard vs. Menu Navigation
Is one method definitively superior? The answer depends entirely on context. Every user should understand the benefits and limitations of both keyboard shortcuts and menu-based navigation to make smart, situational choices.
Benefits of Keyboard Shortcuts
-
Speed and Flow: This is the primary advantage. Once memorized, muscle memory allows for near-instantaneous editing without breaking your typing rhythm. For writers, coders, and data entry professionals, this is irreplaceable.
-
Precision: Your cursor doesn’t move from the insertion point. You maintain laser focus on the content, not the interface.
-
Functionality: Certain commands, like the file Move function (⌘ + Option + V) and advanced pasting, are only easily accessible via the keyboard.
Drawbacks of Keyboard Shortcuts
-
The Learning Curve: There is an undeniable initial cognitive load. Memorizing multiple modifier key combinations can be intimidating for a new user.
-
Physical Challenges: For users with motor skill limitations or specific accessibility needs, holding multiple keys simultaneously can be difficult or impossible.
Benefits of Menu Bar & Right-Click
-
Discoverability: Menus are browsable. A beginner doesn’t need to know a command exists to find it. The Menu Bar acts as a constant, visible index of what an application can do.
-
Simplicity: Right-clicking is a single, universal gesture that is intuitive and requires no memorization. It’s perfect for casual use and file management.
Drawbacks of Menu Bar & Right-Click
-
Slow and Disruptive: The constant back-and-forth movement of moving your hand from the keyboard to the mouse or trackpad creates micro-interruptions that compound into significant time loss and fractured attention over a workday.
-
Inconsistent Menus: Not every right-click menu in every application contains the full list of editing commands.
The professional strategy is not to choose one over the other, but to use menus as a gateway to learning shortcuts. Lean on the Edit menu as a visual reference, but actively commit to using the keyboard command once you see it, accelerating your journey to fluency.
Practical Scenarios and Actionable Tips
To truly internalize these shortcuts, you must apply them to real-world, everyday situations. Here are some common scenarios and pro tips that demonstrate the practical power of mastering how to copy and paste on a MacBook.
Scenario 1: The Research Paper
You are writing a term paper and need to pull a critical citation from a PDF journal article. You copy the quote from the PDF using ⌘ + C, switch to your Pages document, and paste it. The quote appears in a jarring 10-point Courier New font, completely mismatched with your 12-point Times New Roman essay.
The Fix: Instead of spending a minute manually reformatting the quote, immediately press ⌘ + Z to undo the paste. Then, use the ⌘ + Shift + Option + V shortcut to paste the text again. It will magically adopt the surrounding formatting of your essay. This alone can save you an hour of editing over the course of a large project.
Scenario 2: The Messy Downloads Folder
Your desktop or Downloads folder is a chaotic mess of screenshots, PDFs, and images. You decide to finally organize it by moving everything into categorized subfolders. You select a group of screenshots and instinctively press ⌘ + X, hoping to cut them. Nothing happens.
The Fix: Press ⌘ + C to copy the screenshots. Navigate to your newly created “Screenshots” folder. Then, press ⌘ + Option + V. All the files will move neatly into their new home, cleaning the originals from your cluttered space. This is the only clean way to “cut” files in the Finder.
Scenario 3: The Complex Link
You’re composing a slick, professional email and want to embed a long, ugly tracking URL behind a clean, descriptive phrase like “Read Our Full Guide.” You need to copy the text you want to serve as the anchor, not just the link.
The Pro Tip: Do not copy the URL from Safari’s address bar using ⌘ + C. This copies the URL string. Instead, use a dedicated link management app or email client functionality to properly create a hyperlink. However, if you need to copy text that already has a link embedded in it from a web page, simply selecting the text and using ⌘ + C will often copy the rich text formatting, including the embedded link. When you paste it into Apple Mail or Outlook, the link will remain active.
Actionable Expert Tips:
-
Copy Without a Physical Keyboard: If you’re using the on-screen Accessibility Keyboard, you can trigger shortcuts by pressing a modifier key like ⌘, which will change the keyboard to display action keys, or by enabling Sticky Keys in System Settings to press keys in sequence rather than simultaneously.
-
View the Clipboard: macOS doesn’t have a built-in, persistent clipboard viewer. However, you can quickly see the last item you copied by opening the Finder and going to the Edit menu. Select Show Clipboard. A small window will pop up displaying the text or a file name you last copied.
-
Kill Formatting as a Habit: If you frequently paste between disparate sources, consciously retrain your muscle memory to replace ⌘ + V with ⌘ + Shift + Option + V. For more non-stop, high-speed text processing, this single habit change can eliminate a massive amount of formatting friction.
The philosophy behind these tools isn’t just about working faster; it’s about achieving a state of “flow,” where the technology fades into the background. When researching how to set up an efficient workstation to maximize this kind of flow, learning the core software is just as vital as the hardware. For instance, the precision and customization used to create a mobile triple screen setup simracing (which relies on monitors with fast response times and versatile connectivity) mirrors the deliberate customization you apply to your keyboard shortcuts to create a perfectly responsive digital environment.
Conclusion
Mastering how to copy and paste on a MacBook is far more than a trivial technical checkbox; it is an empowering transition into the macOS philosophy. What begins as a frustrating battle with an unfamiliar Command key can quickly evolve into a fluid, intuitive dance between your hands and your thoughts. This guide has moved beyond the single shortcut to provide a complete framework for command, from the fundamental ⌘ + C and ⌘ + V to the formatting savior ⌘ + Shift + Option + V and the file management perfection of ⌘ + Option + V.
The key takeaways are clear. First, invest the mental energy to replace Ctrl with ⌘ for all primary system actions. Second, adopt the Paste and Match Style shortcut as your new default to end the war on mismatched fonts. Third, leverage the power of Universal Clipboard to treat your Apple devices as a single, seamless workstation rather than isolated machines.
These seven shortcuts are your building blocks. The goal is not just to memorize them but to weave them into your muscle memory so completely that they become an unconscious extension of your intent. When you no longer have to think about the keys, you are no longer just using the computer; you are effortlessly working through it. Start with one shortcut at a time, use the Edit menu as your on-screen guide, and build the fluency that will make your MacBook the most productive tool you’ve ever owned.