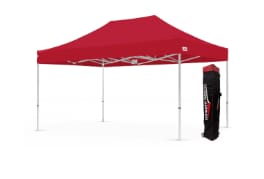
Let’s face it — a few things can transform an outdoor event from “meh” to magnificent, quite like a 10 x 20 canopy. Whether you’re hosting a bustling trade show booth, a weekend market stand, or a chic outdoor celebration, a well-set-up canopy can mean the difference between smooth success and chaotic catastrophe (yes, we’ve seen a few canopies take flight mid-event).
The good news? Setting up and securing a 10 x 20 canopy doesn’t have to be complicated or stressful. With the right approach — and a little bit of know-how — you can go from boxed-up bundle to brand-worthy setup in no time. Let’s walk through it, step by step, with a few laughs and pro tips along the way.
Step 1: Choose Your Location — Because Real Estate Matters
Before you even think about unrolling your 10 x 20 canopy, pause for a moment and consider where you’re setting up. Not all grounds are created equal.
- Flat and solid ground: Ideal for setup stability. Asphalt, concrete, or packed dirt works best.
- Grass or soil: Fine too, but you’ll need extra anchors to keep it steady.
- Uneven ground: Proceed with caution. If it’s sloped or bumpy, your canopy might end up looking like the Leaning Tower of Pisa.
If you’re at an event venue or market, check for wind conditions, nearby structures, and space for people to move around. Remember — you’re not just setting up a shelter; you’re building your brand’s mini headquarters.
Step 2: Unpack and Inspect Your Gear
Now comes the fun part — the big reveal. Unbox your 10 x 20 canopy tents and lay out all the components neatly. This usually includes:
- The frame (usually collapsible and made of heavy-duty aluminum or steel)
- The canopy top (made of waterproof and UV-resistant fabric)
- Stakes, ropes, and weights for securing
- Optional extras like sidewalls, banners, or accessories
Before jumping into the assembly, do a quick inspection. Check for dents in the frame, small tears in the fabric, or missing components. A quick check now saves you from facepalming later when you realize your canopy’s missing a leg screw halfway through setup.
Step 3: Assemble the Frame (a.k.a. “Teamwork Makes the Dream Work”)
Here’s where you might want to call a friend — or two. A 10 x 20 canopy is spacious, and while it can technically be assembled solo, having an extra pair of hands will make the process faster (and prevent you from turning into a pretzel).
Step-by-Step Frame Setup:
- Unfold partially: Stand on opposite sides of the frame and gently pull it open to about halfway.
- Attach the canopy top: Before extending it fully, drape the canopy fabric (your “roof”) over the frame and secure it loosely with the Velcro or straps provided.
- Extend and lock: Slowly expand the frame to full size while making sure the fabric aligns properly. Lock the joints and legs in place securely.
- Raise the height: Adjust the legs to your desired height, starting from one side and moving evenly across.
Pro tip: Always lock the legs into position before walking away. Otherwise, you risk an “oops” moment when it collapses mid-setup.
Step 4: Secure Your Canopy Like A Pro (Because Wind Is Sneaky)
Here’s where most first-timers go wrong. They set up their beautiful 10 x 20 canopy tents, admire their handiwork, and walk away — only to return to find it rolling down the street like tumbleweed. Don’t be that person.
How to Keep Your Canopy Grounded:
- Use stakes: If you’re on grass or soil, drive heavy-duty stakes into the ground at each leg corner.
- Add weights: On hard surfaces, use sandbags, water weights, or specially designed canopy anchors. A 20- to 30-pound weight per leg is ideal.
- Ropes and tensioners: Attach guy lines from the top corners of the canopy to the ground. This provides extra tension and prevents swaying.
- Double-check connections: Every joint and clip should be snug — the sturdier the base, the more reliable your setup.
For windy locations or large-scale setups like 20×20 canopy tents, consider industrial-grade weights and reinforced tie-downs. The bigger the tent, the more wind resistance you’ll need.
Step 5: Add Branding and Accessories
Once your structure is up and secure, it’s time to make it shine — figuratively and literally.
Add sidewalls for privacy or shade, string LED lights for evening events, and hang banners or flags to show off your logo. If you’re using the canopy for business, a branded design is non-negotiable. A 10 x 20 canopy with vibrant, customized graphics turns your booth into a visual magnet.
High-quality printing on your fabric can transform your canopy from “just another tent” into a powerful marketing tool. And if you’re ever scaling up your setup for large corporate events or festivals, upgrading to a 20×20 canopy gives you even more real estate for branding brilliance.