


Whether you are a teacher creating educational materials, a software developer documenting bugs, a graphic designer seeking inspiration, or a business professional preparing a presentation, the ability to capture exactly what is on your screen is no longer a luxury—it is a necessity. While Microsoft Windows 10 and 11 come with basic built-in tools like the Snipping Tool and the newer Snip & Sketch, these native options often fall short when users require advanced editing, scrolling captures, or automated workflows. This gap in functionality is where dedicated solutions shine. For users seeking easy screenshot software for Windows 10 and 11 Ashampoo Snap features and tutorial content, you have arrived at the right place. Ashampoo Snap has long been a titan in the screen capture industry, offering a blend of intuitive design and professional-grade tools that empower users to go far beyond a simple image of their desktop.
Why Standard Screenshot Tools Aren’t Enough
Before we delve into the specifics of Ashampoo Snap, it is worth understanding why millions of users are moving away from the default Windows utilities. The built-in options are excellent for quick, one-off captures. However, if your work involves creating tutorials, reporting complex software issues, or designing user guides, the limitations become apparent quickly.
For instance, capturing a long webpage or a scrolling window in a single image is impossible with standard tools. Similarly, if you need to annotate an image with arrows, numbers, or blur sensitive information, the editing capabilities of free tools are rudimentary at best. This is where Ashampoo Snap bridges the gap, transforming a simple screenshot into a comprehensive visual documentation tool.
What is Ashampoo Snap?
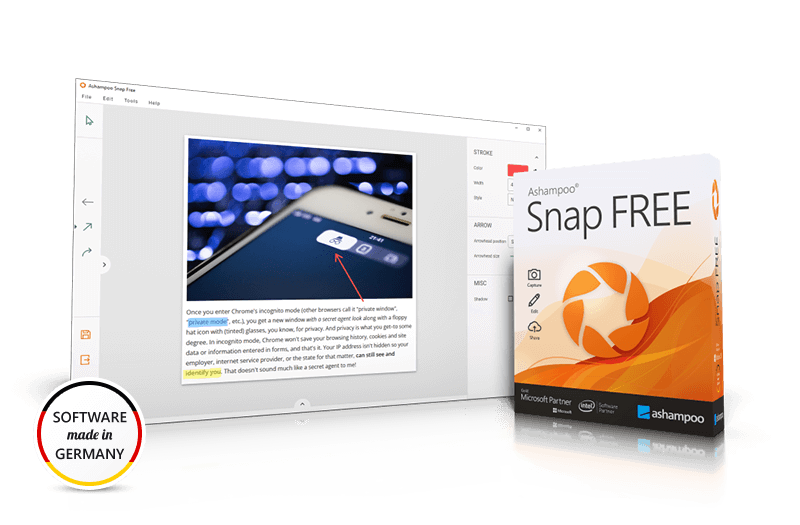
Ashampoo Snap is a premium screen capture and image editing software developed by the German software company Ashampoo. It is designed specifically for Windows operating systems, with full optimization for both Windows 10 and Windows 11. Unlike basic capture tools, Ashampoo Snap acts as a Swiss Army knife for visual content creation. It allows users to capture not only static screenshots but also videos, scrolling windows, and even menu hierarchies with a single click.
The software is renowned for its speed and stability. It sits discreetly in the system tray, waiting for a hotkey press or a click on its icon. Once activated, the user can select from a variety of capture modes, edit the resulting image in a powerful built-in editor, and export it in dozens of formats or directly to the cloud. For professionals who value time, this streamlined workflow is invaluable.
Key Features That Define Ashampoo Snap
To truly understand why this is considered the best easy screenshot software for Windows 10 and 11 Ashampoo Snap features and tutorial material, we must break down its core functionalities. The software is packed with features, but they are organized in a way that does not overwhelm the new user while providing depth for the power user.
1. Versatile Capture Modes
The foundation of Ashampoo Snap is its ability to capture anything. The software offers several distinct modes:
- Freehand Capture: Allows you to draw an irregular shape around the area you want to capture.
- Window/Control Capture: Automatically detects the boundaries of a specific window or even a single button within a window, capturing it perfectly without the need for manual cropping.
- Scrolling Capture: This is one of the most celebrated features. It allows you to capture entire web pages, lengthy documents, or chat histories that extend beyond the visible screen area. The software scrolls automatically and stitches the images together seamlessly.
- Video Capture: Beyond screenshots, Ashampoo Snap can record screen activities as videos (MP4 or GIF). This is perfect for creating software tutorials, recording video calls, or capturing gameplay for analysis.
- Timer Capture: Ideal for capturing context menus or dropdown lists that disappear when you click the mouse. You set a delay, trigger the menu, and the software captures it after the countdown.
2. Integrated Image and Video Editing Studio
Once you take a capture, Ashampoo Snap does not just save it; it opens it in a robust editing studio. This studio is where the magic happens. Users can:
- Annotate: Add text boxes, arrows, callouts, numbers, and shapes to guide the viewer’s eye.
- Blur and Pixelate: Privacy is a major concern in the digital age. The software allows you to blur or pixelate sensitive information like passwords, email addresses, or confidential data.
- Color Picker: A built-in color picker lets you grab exact color codes from anywhere on the screen, a boon for web designers and developers.
- Multi-Page Editing: You can combine multiple captures into a single document, creating a PDF or image series that tells a cohesive story.
- Video Editing: For video captures, you can trim clips, adjust resolution, and add annotations directly onto the video timeline.
3. Automated Workflows and One-Click Export
Time efficiency is a core principle of Ashampoo Snap. The software allows users to define destinations for their captures. You can set it to automatically:
- Copy the capture to the clipboard.
- Save it to a specific folder with a custom naming scheme.
- Upload it directly to Ashampoo’s web space, Imgur, or other cloud services, generating a shareable link instantly.
- Open it in a specific editor or send it directly to a printer.
This level of automation removes the friction from repetitive tasks, making it an indispensable tool for professionals who need to create visual assets quickly.
4. User Interface Optimization for Windows 11
With the release of Windows 11, many users worried about software compatibility. Ashampoo Snap has been meticulously updated to match the aesthetic and functional standards of the new OS. It supports dark mode, respects the new rounded corner UI, and integrates seamlessly with the Windows 11 context menu and notification system.
A Step-by-Step Tutorial: Getting Started
For those new to the software, setting up and using Ashampoo Snap is a straightforward process. This tutorial will guide you through the initial setup and a few common use cases to get you started on your journey to mastering visual documentation.
Installation and Initial Setup
- Download: Visit the official Ashampoo website to download the latest version of Snap. Ensure you download it from the official source to guarantee security.
- Installation: Run the installer. The process is standard; you will be guided through the license agreement and installation directory. Once installed, the software typically launches automatically or adds an icon to the system tray.
- Activation: If you have purchased a license, enter the license key. Most versions offer a trial period, allowing you to test the full functionality before committing.
- First Launch: Upon first launch, Ashampoo Snap may present a welcome wizard. This wizard helps you configure basic settings like the destination folder for captures, preferred hotkeys, and whether you want the editor to open automatically after a capture.
Tutorial 1: Capturing and Annotating a Specific Window
Let’s say you are writing a guide on how to use a specific feature in a spreadsheet application.
- Trigger Capture: Press the default hotkey (often F11 or Ctrl + Shift + S) or click the camera icon in the system tray.
- Select Mode: In the capture toolbar that appears, choose “Window Capture.” Hover your mouse over the spreadsheet window. You will see a colored border highlight the window boundaries.
- Capture: Click the mouse. The image is immediately taken and opened in the Ashampoo Snap Editor.
- Annotate:
- Use the “Arrow” tool to point to the specific button you are explaining.
- Use the “Text” tool to add a description. You can change the font, size, and color for clarity.
- Use the “Number” tool to create step-by-step callouts (1, 2, 3).
- If there is a personal name in the document, use the “Blur” tool to obscure it.
- Export: Click the “Export” button (or the floppy disk icon). You can save it as a PNG for high quality, a JPEG for smaller size, or even directly copy it to the clipboard to paste into an email or a Word document.
Tutorial 2: Capturing a Scrolling Webpage
One of the most common frustrations with default tools is the inability to capture a full webpage. Here is how Ashampoo Snap solves this:
- Open the Webpage: Navigate to the website you want to capture in your browser.
- Select Scrolling Capture: Click the Ashampoo Snap tray icon and select “Scrolling Capture” from the menu.
- Select Region: A crosshair appears. Click and drag to select the specific area of the webpage you want to capture. Ensure the area is wide enough to cover the content but not so wide that it includes unwanted sidebars.
- Automatic Scroll: Release the mouse button. The software will automatically start scrolling the window slowly, stitching the images together in real-time. You will see a progress indicator.
- Finish: Once the scroll reaches the bottom, the capture stops, and a complete, seamless image of the entire webpage opens in the editor. You can now annotate or save this long-form image for your records or presentations.
Tutorial 3: Recording a Video Tutorial
Video tutorials are highly effective for demonstrating dynamic processes.
- Select Video Capture: In the Ashampoo Snap menu, choose “Video Capture.”
- Select Region: Click and drag to define the area of the screen you want to record. You can choose to record the entire screen, a specific window, or a custom region.
- Configure Settings: A small control panel will appear. Here, you can choose to record system audio, microphone input, or both. You can also select the output format (MP4 is recommended for most users).
- Start Recording: Click the red record button. The software will count down from 3 and begin capturing.
- Stop Recording: When you are finished, click the stop button in the floating toolbar.
- Editing: The video will open in the Ashampoo Snap Video Editor. Here, you can trim the beginning or end, add text annotations that appear at specific times, and even highlight mouse clicks to make them more visible to the viewer.
Enhancing Productivity with Automation
While the manual controls are powerful, the true value of Ashampoo Snap lies in its ability to adapt to your workflow through automation. For users who rely on this software daily, setting up “Capture Profiles” is a game-changer.
You can create different profiles for different tasks. For example:
- Profile A (Web Designer): Automatically saves captures in PNG format to a folder named “Design_Assets,” opens the editor for quick color picking, and copies the file path to the clipboard.
- Profile B (Support Team): Captures images, automatically blurs the user’s email address based on a preset rule, and uploads the annotated image to a cloud service, placing the shareable link directly into the user’s clipboard for pasting into a support ticket.
To set this up, navigate to the settings menu and explore the “Destinations” and “After Capture” tabs. These settings allow you to create a tailored experience that minimizes clicks and maximizes output.
Comparing Ashampoo Snap to Alternatives
In the realm of easy screenshot software for Windows 10 and 11 Ashampoo Snap features and tutorial discussions, it is important to acknowledge the landscape. Alternatives like Snagit (by TechSmith) offer similar high-end features, while free tools like Greenshot or Lightshot cater to the budget-conscious user.
So, where does Ashampoo Snap fit?
- Vs. Free Tools (Greenshot, Lightshot): Ashampoo Snap offers a significantly more polished interface, superior video recording capabilities, and a much more robust built-in editor. Free tools often require external programs for video or advanced annotations. For users who value a seamless, all-in-one experience, the premium nature of Snap is justified.
- Vs. Snagit: Snagit is the market leader and is slightly more expensive. Ashampoo Snap is often praised for having a more intuitive user interface for beginners and a lower price point while delivering 95% of the same functionality. For most professionals, Snap provides everything needed without the extra cost associated with enterprise-level software.
You can also explore other high-quality software solutions that focus on user experience and data integrity. For a broader view of reliable software options, check out this insightful article on essential software tools for modern professionals , which covers various utilities that enhance digital workflows.
Additionally, understanding the best practices for managing digital projects is crucial. When you are creating screenshots and videos for project documentation, having a solid project management framework is key. You might find value in reading about how to streamline your digital workspace , which complements the organizational power of Ashampoo Snap.
For those who frequently work with images and media, combining Ashampoo Snap with robust editing suites can further elevate your output. A guide on top media management techniques can help you organize the high volume of visual assets you might generate.
The Role of Screenshots in Ethical Business Practices
In Islam, clarity, honesty, and the avoidance of ambiguity (gharar) in transactions and communications are highly valued. Screenshots and visual documentation play a crucial role in upholding these values in the digital age. When conducting business online, providing clear visual evidence of agreements, product specifications, or transaction details helps prevent misunderstandings and disputes.
Ashampoo Snap facilitates this ethical clarity. Its ability to capture scrolling windows ensures that no part of a contract or conversation is cut off. Its annotation tools allow users to highlight specific terms or conditions that are important for transparency. By using such tools to create clear, undeniable records of digital interactions, professionals can align their workflows with principles of honesty and fairness.
Deep Dive: Ashampoo Snap 2024 (Latest Version)
The latest iteration of the software, Ashampoo Snap 2024, introduces several refinements that further solidify its position as a leader in the market. Key improvements include:
- AI-Powered Object Recognition: The new version includes features that help automatically recognize and separate objects within a capture, making it easier to edit backgrounds or isolate specific UI elements.
- Enhanced GIF Creation: While video recording was always strong, the new version optimizes GIF creation for smaller file sizes without sacrificing visual quality, making it ideal for sharing quick demos on social media or in chat apps.
- Improved 4K and HiDPI Support: For users with high-resolution monitors, the new version ensures that captures and recordings look crisp and pixel-perfect, without scaling artifacts that plagued some earlier software.
Troubleshooting Common Issues
Even the best software can occasionally hit a snag. Here are quick solutions to common problems users face with Ashampoo Snap:
- The software isn’t capturing dropdown menus: This is a common issue with many capture tools. Use the “Timer Capture” mode. Set a 5-second delay, open your dropdown menu, and wait for the software to capture it.
- Scrolling capture stops too early: Ensure that the area you selected for scrolling capture does not include a fixed element (like a sidebar ad) that doesn’t scroll. The software stops when the selected region stops moving. Try selecting a slightly narrower area.
- Video file size is too large: Go to the video capture settings and reduce the frame rate from 60fps to 30fps or 15fps. For tutorials, high frame rates are often unnecessary and drastically increase file size. Also, consider using the MP4 format with H.264 compression for the best balance of quality and size.
Conclusion
Navigating the world of screen capture can be overwhelming, but the goal remains simple: to communicate ideas visually with clarity and efficiency. For users of Microsoft’s latest operating systems, the need for a tool that can handle everything from quick annotations to full video tutorials is critical. Ashampoo Snap meets this need by combining a user-friendly interface with a professional feature set.
By understanding the easy screenshot software for Windows 10 and 11 Ashampoo Snap features and tutorial laid out in this guide, you are now equipped to transform how you document, share, and collaborate. Whether you are creating a complex user manual, reporting a bug to your IT department, or simply sharing a recipe with a friend, Ashampoo Snap provides the tools to do it faster and more professionally.
The software represents an investment in productivity. By automating repetitive tasks, providing powerful editing tools, and ensuring compatibility with the latest Windows environments, it allows you to focus on the content of your message rather than the mechanics of capturing it. For a deeper understanding of the technical infrastructure that supports such software, you might find the detailed history on software development and utility tools on Wikipedia insightful, as it outlines the evolution of how we capture digital moments.
Ultimately, the best tool is the one that gets out of your way and lets you work. Ashampoo Snap does precisely that, making it a worthy addition to any digital professional’s toolkit.


